

Host a Minecraft server with Pterodactyl
A complete walkthrough: rent a VM, install the Pterodactyl panel with its one-script installer, launch a Paper server, add plugins like BlueMap and Simple Voice Chat, and set up automated backups. No domain required, one hour start to finish.
Prerequisites
- A ServersCamp account (registration guide)
- An SSH key added to your account (the Create a VM wizard can generate one)
- Any SSH client on your machine
Pick a size for your Minecraft server
Start from how many players and plugins you expect. Pterodactyl and the Java runtime eat a share of the machine themselves, so the game server never gets 100% of the box - the table already accounts for that.
| Plan | Specs | Best for |
|---|---|---|
| hf-s | 2 vCPU, 4 GB RAM | 3-5 players and a few plugins. Give the game server itself no more than 2 GB. |
| hf-m | 4 vCPU, 8 GB RAM | The sweet spot. 10-15 players with 12-chunk render distance and 20+ plugins, BlueMap included. |
| hf-l | 6 vCPU, 16 GB RAM | Communities of 20-30 people that want a smooth BlueMap, shaders and a plugin-heavy economy. |
| hf-xl | 8 vCPU, 32 GB RAM | Large networks and multi-world setups. |
This guide uses hf-m (4 vCPU / 8 GB): every number below (memory limits, CPU limits) assumes it. Scale them if you picked another size.
Create the VM
- In the Cloud Panel go to Virtual Machines and click Create VM
- OS: Ubuntu. We use the current LTS; the pterodactyl-installer README lists every supported version
- Hardware: High Frequency - Minecraft is single-thread bound, fast cores matter more than many cores
- Size: hf-m or whatever row of the table fits your community
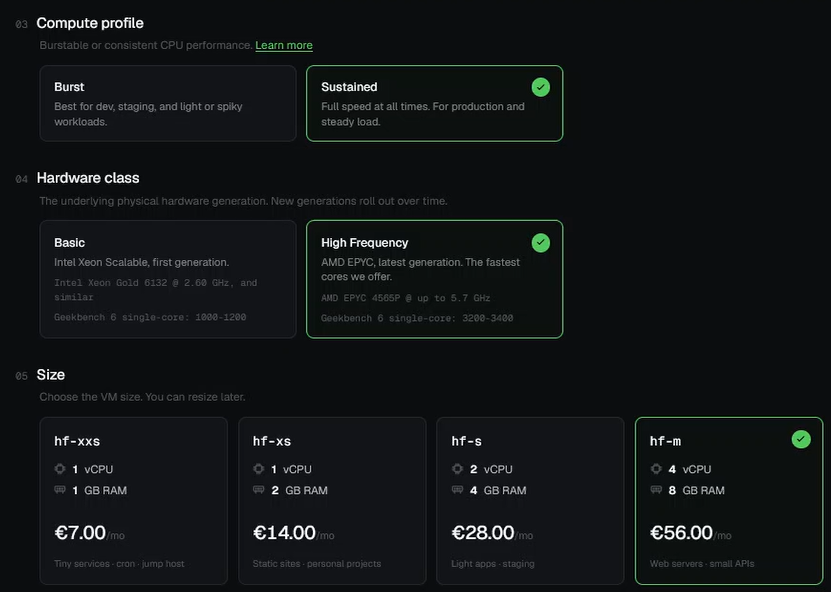
- Disk: 100 GB or more - a grown world, BlueMap renders and a stack of backups all live here. This guide assumes 160 GB. Disk speed can stay at the default
- Attach your SSH key and click Create
Connect and update
SSH to the VM's public IP (shown on the VM details page; see Connect to your VM) and bring the packages up to date:
sudo apt update && sudo apt upgrade -yInstall the Pterodactyl panel
Switch to root and run the community installer:
sudo su
bash <(curl -s https://pterodactyl-installer.se)
The script asks a series of questions. Here is the map:
- What to install: option 2 - panel and Wings together
- Database: press Enter for database name and username, set your own password
- Timezone: yours, in tz format, for example
Europe/Berlin - Email for Let's Encrypt: any address - this walkthrough runs without a domain, so it is not used
- Admin profile: email, username, first and last name, password. The email and username are your panel login - remember them
- FQDN: the VM's public IP. The script warns that no SSL certificate will be requested for a bare IP - accept
- UFW rules: yes, let it configure the firewall
- Answer the telemetry question, confirm with
y, and let it install
When the panel part finishes, the script moves on to Wings (the daemon that actually runs game servers):
- Let it configure UFW rules for Wings
- Let it configure the database user automatically
- Say no to exposing MySQL publicly - a single-box setup does not need it
- Set the database password when prompted
- Say no to HTTPS via Let's Encrypt (no domain, remember)
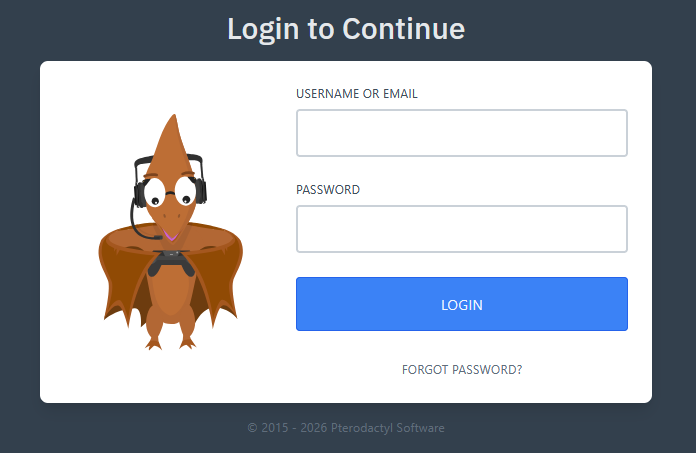
Open http://your_server_ip in a browser and log in with the admin credentials you just created. The login page may show a captcha - that is the panel's built-in bot protection.
Configure the panel: location and node
Pterodactyl was designed to manage fleets, so it has a Location → Node → Servers hierarchy. Even a single-box setup needs one of each. Click Admin (top left) to open the admin area.
1. Create a location
Under Management → Locations click Create New and enter any short code, for example lvl0. Locations only group nodes; with one server the name does not matter.
2. Create the node
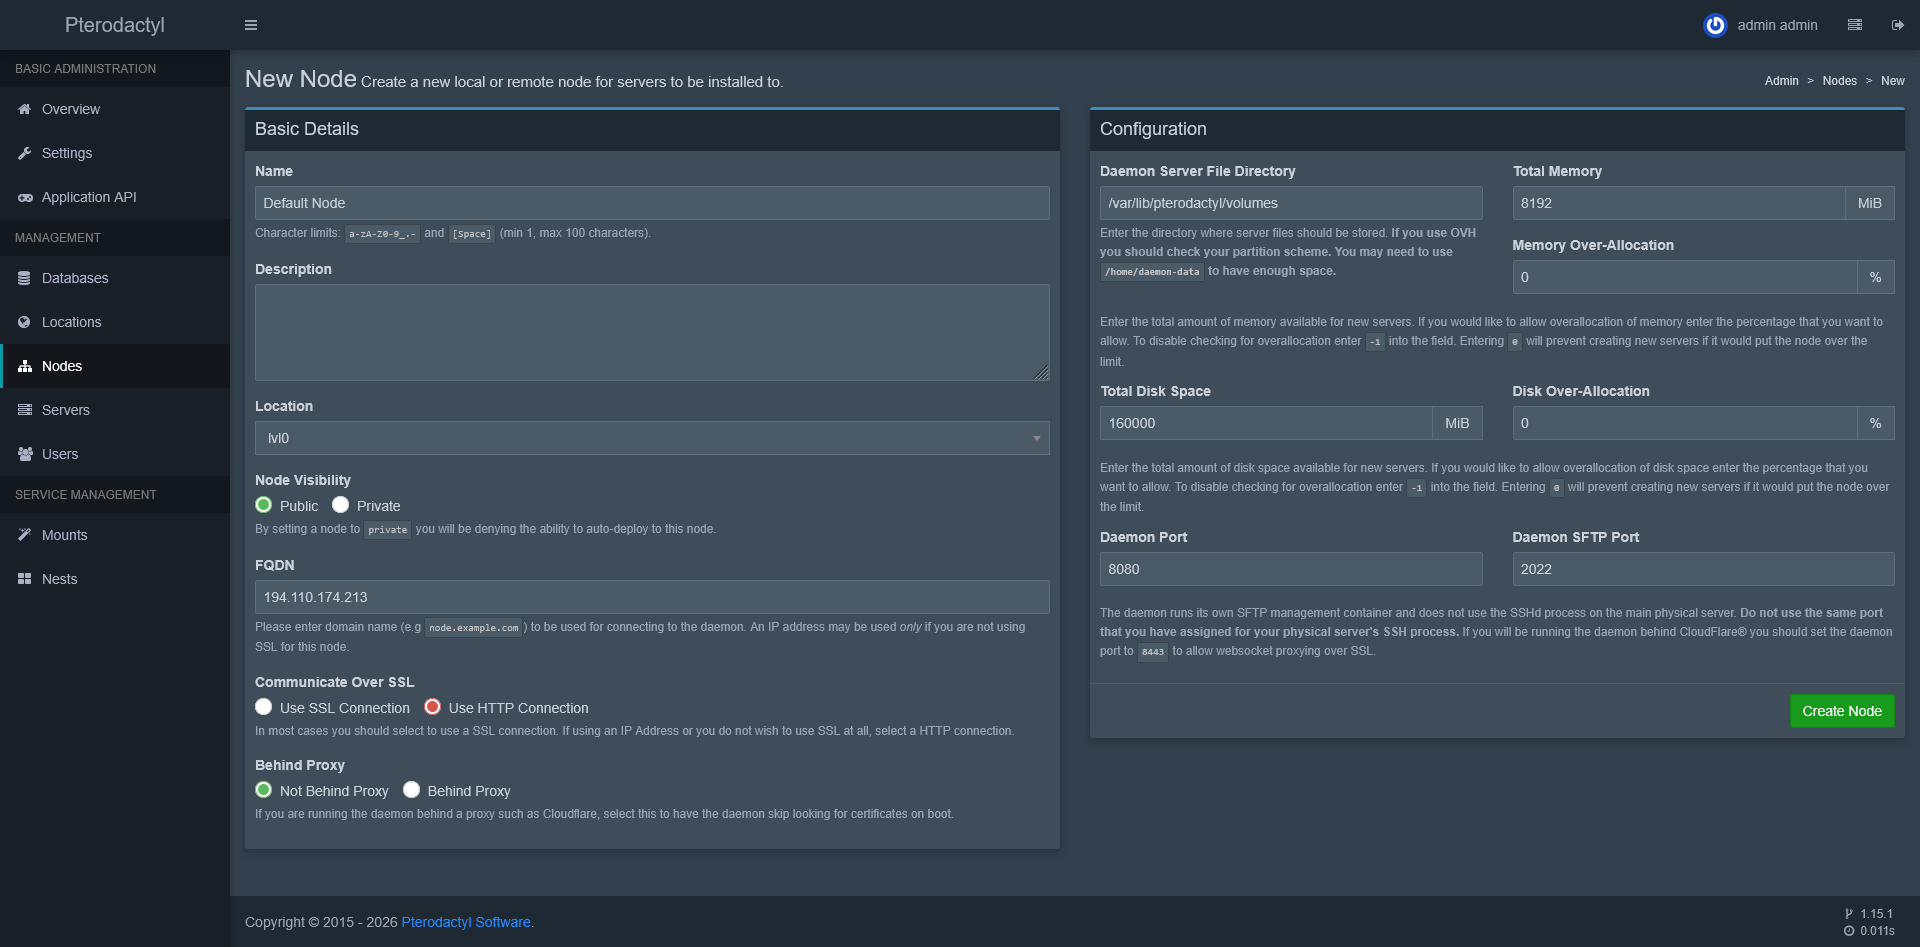
Go to Nodes → Create New and fill in:
- Name:
Default Node - Location:
lvl0 - Node Visibility: public
- FQDN: the VM's public IP
- Communicate over SSL: Use HTTP Connection
- Behind Proxy: Not Behind Proxy
- Total Memory:
8192, Memory Over-allocation:0 - Total Disk Space:
160000, Disk Over-allocation:0 - Daemon Port:
8080, Daemon SFTP Port:2022
Zero over-allocation means the panel will refuse to create a second server past the machine's real capacity - a useful guard on a single box. Click Create Node.
3. Allocate ports
After the node is created you land on its allocations page. Under Assign New Allocations enter:
- IP Address:
0.0.0.0 - Ports:
25565- the Minecraft default. Add8100for BlueMap and25545for Simple Voice Chat now if you plan to run them
Click Submit.
Connect Wings to the panel
Open the node's Configuration tab and click Generate Token. Copy the generated command into your SSH session and run it - it writes the Wings config for this panel.
Two small config fixes remain. First, the panel talks to Wings from the browser, and a bare-IP setup needs the origin allowed explicitly:
nano /etc/pterodactyl/config.ymlFind allowed_origins: [] and change it to (with your real IP):
allowed_origins:
  - http://your_server_ip
Save with Ctrl+S, exit with Ctrl+X. Second, game servers run in Docker containers, and UFW blocks forwarded traffic by default:
sudo nano /etc/default/ufwChange DEFAULT_FORWARD_POLICY="DROP" to "ACCEPT", save, then sudo ufw reload. Give the containers public DNS resolvers as well:
sudo nano /etc/docker/daemon.json{
"dns": ["8.8.8.8", "1.1.1.1"]
}Restart everything and enable autostart:
systemctl restart wings
systemctl restart docker
systemctl enable docker
systemctl enable wings
ufw enable
Back in the panel, the node should now show a green heart: Wings is healthy and connected.
Create the Minecraft server
Admin area → Servers → Create New:
- Server Name: anything, for example
MinecraftServer - Server Owner: start typing your admin username and pick it
- Node: Default Node
- Default Allocation:
0.0.0.0:25565 - Additional Allocations: the plugin ports, if you created them
- Backup Limit:
5- covered in the backups section below - CPU Limit:
400%- all four cores - Memory:
8192, Disk Space:160000 - Nest / Egg: Minecraft / Paper
- Docker Image: Java 21
Startup command
The one number that matters here is the Java heap. The panel, Wings and the OS need room, so on an 8 GB machine cap the server at 4 GB:
java -Xms4000M -Xmx4000M -XX:+UseZGC -XX:+ZGenerational -Dterminal.jline=false -Dterminal.ansi=true -jar server.jar4 GB of heap comfortably runs about 20 plugins with 10+ players online. In Service Variables set the Minecraft version you want (for example 1.21.5) and leave the rest at defaults - the egg downloads the matching Paper build as server.jar on its own. Click Create Server.
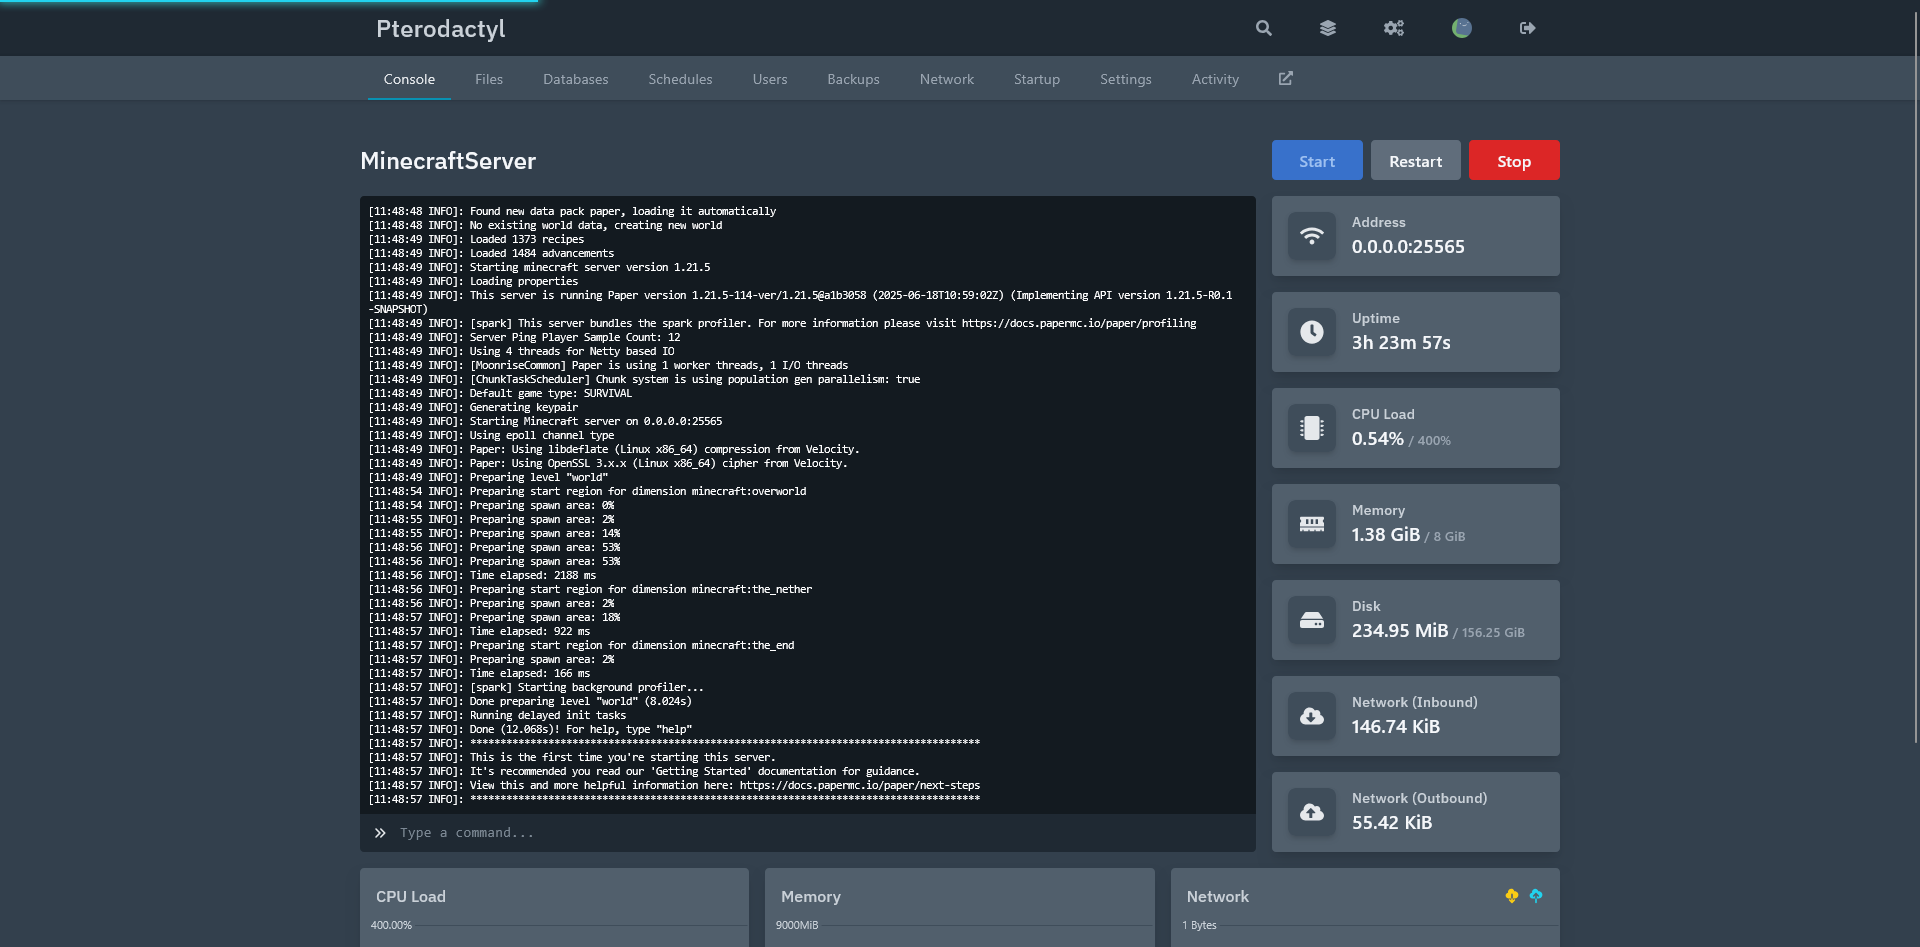
Open the server's console, accept the EULA prompt, and wait for the Done! line. That is it: add the VM's public IP as a server in your Minecraft client and join.
Add plugins: BlueMap, Simple Voice Chat
- Download the plugin from Modrinth or CurseForge, matching your server flavor and version (Paper 1.21.5 here)
- In the server's Files tab open the
pluginsfolder and upload the jar - If the plugin listens on its own port (BlueMap:
8100, Simple Voice Chat:25545), add that port under the node's Allocations with IP0.0.0.0 - Then attach it to the server: Build Configuration → Allocation Management → additional allocation, and save
- Restart the server from the console
BlueMap's live world map then appears at http://your_server_ip:8100/, and Simple Voice Chat works for every player in range.
Automated backups
One bad plugin update or one griefer is all it takes. Backups in Pterodactyl are scheduled per server, and the 160 GB disk fits 10+ backups of a small world or about 5 of a large one.
- Open the server's Schedules tab and click Create Schedule
- The timing uses cron syntax: minutes, hours, day of month, month, day of week.
30 23 * * *is every night at 23:30;0 4 * * 1is Mondays at 04:00 - Open the new schedule, click New Task, and pick Create backup as the action
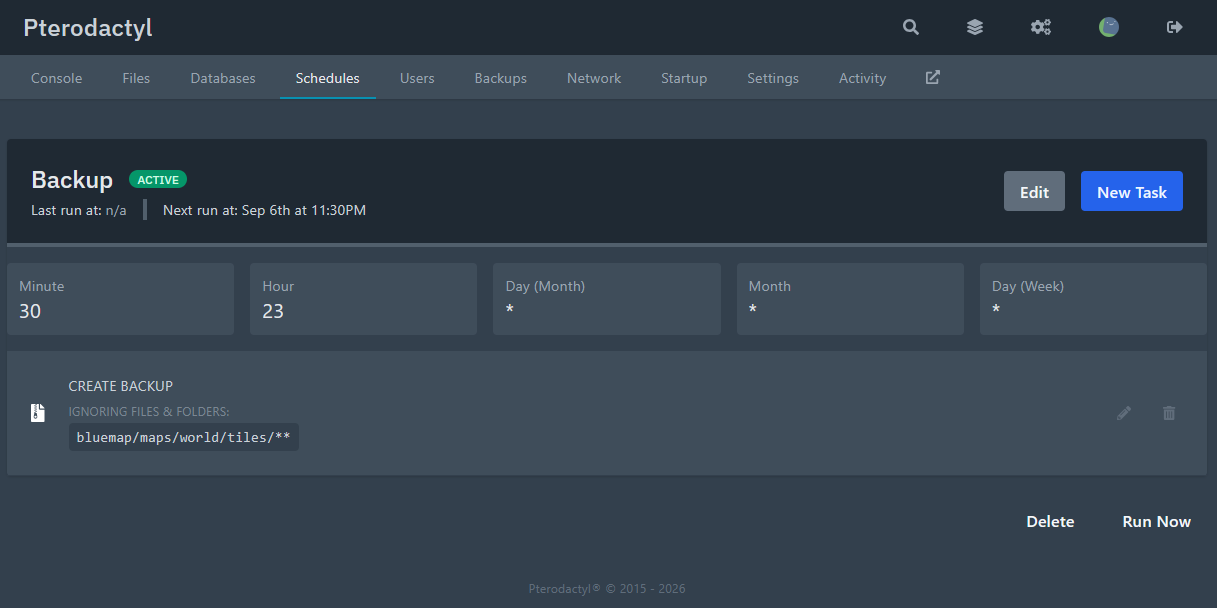
bluemap/web/maps/tiles/** in the task's Ignored Files field - backups shrink dramatically.
Every so often, download a backup off the box too: Backups tab → the three dots next to a backup → Download. A copy on your own machine survives anything that happens to the server.
Optimization tips
- Pre-generate chunks. Chunk generation is the most expensive thing a Minecraft server does. Run the Chunky plugin overnight while nobody is online, and exploration stops costing TPS during play
- Tame the farms. If your players build heavy mob farms, FarmControl trims entity AI and keeps the tick budget sane
- Schedule BlueMap renders. On a 4 vCPU / 8 GB box, configure BlueMap to render only when the server is empty - players get their frames, the map gets rendered while they sleep. See the BlueMap performance guide
What's next?
- Host an Unturned server on the same panel, the node and Wings setup is shared
- Add a second disk when the world outgrows the first one
- VM-level snapshots and backups on top of the in-panel ones
- Read the disk metrics if the server ever feels sluggish
Stuck anywhere? Open a ticket from the Cloud Panel - we are happy to help with game server setups.